Knowledge Base > Orders & Invoices > Entering and Managing Orders
Click 1: Orders 2: New
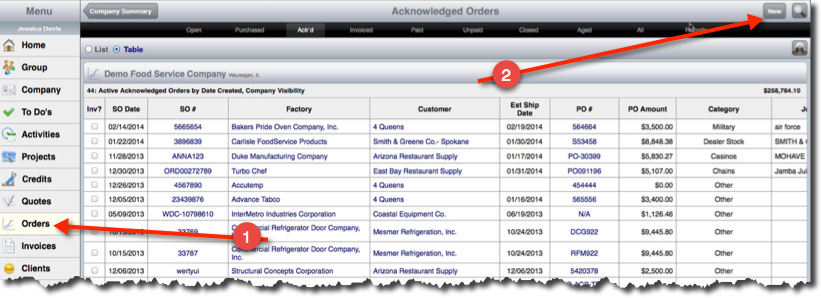
The New button will allow you to select a Factory and then a Customer.
The customers are sorted by type and to change the type, click the magnifying glass to switch customer lists.
Again the blue arrows allow you to quickly add a new customer or factory. Just be sure to have the correct type of customer selected so the added customer goes to the correct list.
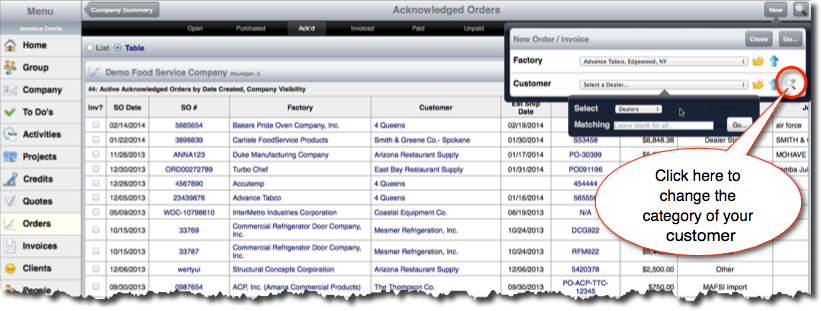
Then click Go….
The New Order screen allows you to enter all data pertaining to your order.
Selecting the status of the order opens up different sections of the screen.
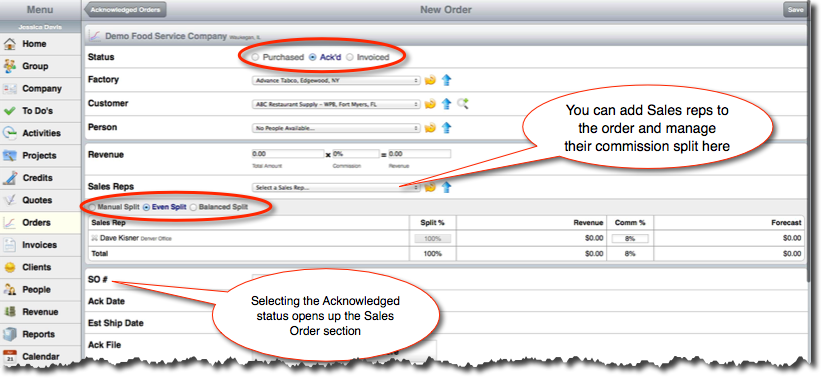
You can manage your Sales reps commission split by selecting the type of split you wish on the order. Orgo will fill in the reps commission based off of the commission placed on the user summary.
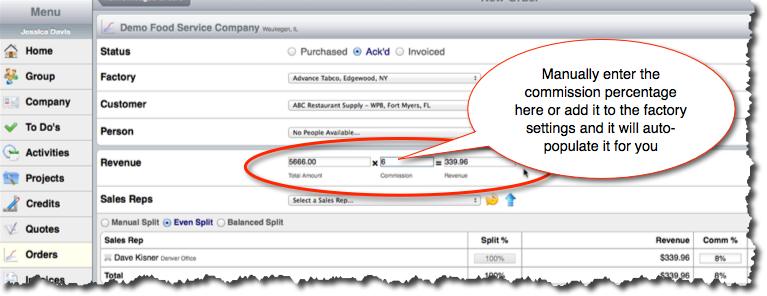
The revenue section of the order allows you to enter the amount of the order as well as the commission percentage. Orgo will auto-populate the commission from the factory settings if a commission was already provided there.
Once an acknowledged order has been invoiced, you can update the order by checking the Inv? box on the order table and then add the Invoice information.
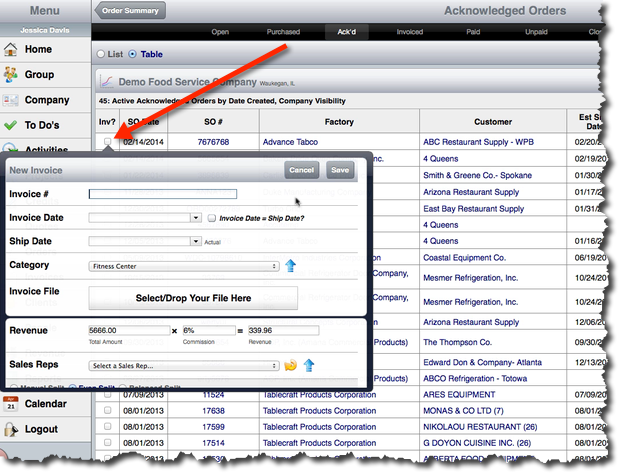
Or you can click on the PO# from the table and then on the order screen, click on Add Invoice.
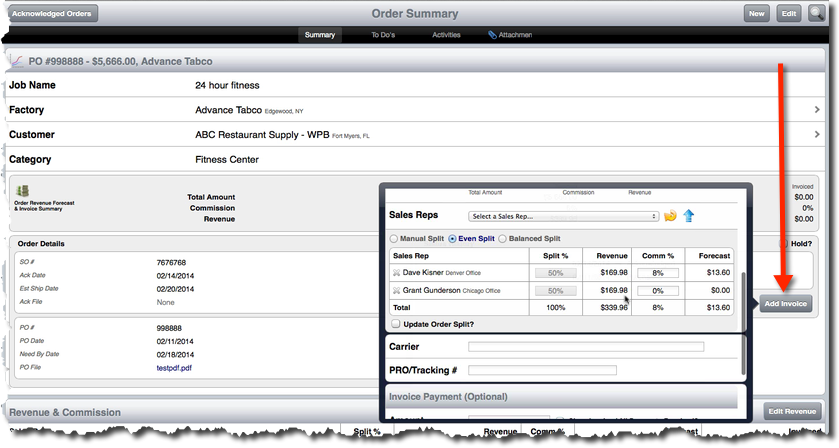
Once you save the invoice information, it will shift the order from an acknowledged state to invoiced. You can add multiple invoices to the same order.
Click on the blue invoice number to go to the Invoice screen where you can add payments as you receive them. To add a payment, just click on the Add Payment button in the Payments Received section. You can either enter the amount of the full payment received, or if you enter a lesser amount, it will show the payment as a partial payment.
The next time you enter a payment, the amount in the box will calculate to the remaining balance on the invoice unless you manually change it.
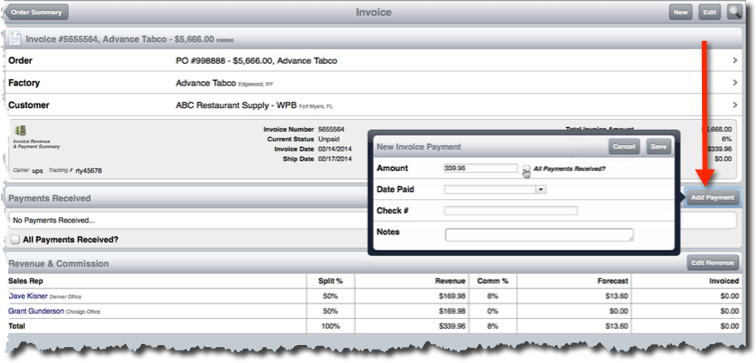
Once the order is paid in full, it will go to a closed status.

